Showing posts with label living room. Show all posts

Thursday, April 2, 2015

#ad Review: ilikethatlamp Lampshade Kit


My Thoughts:

I had always wanted to try my hand at making a lampshade but never got around to doing it, in part because I wasn't exactly sure how to do it or how big of a project it would be. After completing one using the ilikethatlamp Lampshade kit, I would not hesitate to take on another DIY project like again.

I had read the reviews of this product before accepting to do a review on it (I was given it for free, bu no monetary compensation was received) and read about the issues with the glue, but I wanted to first say that my glue was exactly as I expected it to be and was sticky glue. I found that once you smeared the glue on with the orange stick they give you, if you let it sit for 10-15 seconds it will start to get tacky and will stick easily and securely compared to if you put the glue on and tried to stick the pieces together right away.

I followed the instructions just as they were written (except it said to use a natural fiber fabric and the fabric I liked wasn't a natural fiber and it worked just fine) and I was easily able to make a lampshade. The instructions were clear and easy to follow. I was pretty happy to try out this project because I take pride in all my DIY projects and do a lot of them, but this was my first time making a lampshade and it was super easy to do. I love that I can tailor the look of my room to some fabric I purchase rather than have to be dependent on what is available on store shelves.

They come in a variety of sizes. This one was a 12"x12" lampshade kit, but there are 8 total different sizes to choose from. Below I will tell you just how easy it is to make your own.

Buy an ilikethatlamp Lampshade kit on Amazon!!!


When you buy the ilikethatlamp Lampshade Kit on Amazon, it comes with everything you pretty much need except the fabric and a pair of scissors


Cut out the size of fabric you need, allowing 1/2" edges around the perimeter. Start out by ironing your fabric so that it is nice and smooth. This will make it much easier to work with and look better.


Apply the adhesive styrene on one end and slowly work to apply the entire length.Firmly press the styrene down so that all of it is stuck to the fabric, Then trim your edges to make sure they are 1/2" on 3 edges and cut right up to the styrene on one of the short edges. Use the orange stick to smooth out any bubbles in the fabric.


Apply the glue to the short end with 1/2" of fabric. Spread the glue with the orange stick and allow it to sit for 10-15 seconds to get tacky. Then press down on top of the styrene.


Start with the top ring and clip it in to place with the lampshade drum surrounding it on the outside. Apply glue to the 1/2 fabric around the top. Spread the glue with the orange stick and allow it to sit for 10-15 seconds to get tacky. Then press down on top of the styrene over the ring. Allow to sit for 5-10 minutes to make sure the fabric stays glued down over the ring.


Repeat the following step with the bottom ring. Allow it to sit with the clips on for 5- 10 miutes before removing clips. Let it dry completely before installing on your lamp.


Product Description from ilikethatlamp:


Our DIY Lampshade Kits include everything you need to make your own custom lampshade at home using your own fabric, so you can coordinate it with your home decor!

Customers love being able to choose the height and diameter of their finished shade, so it fits perfectlu on their existing floor or table lamp.

The detailed, illustrated instructions and pre-measured components in the kit makes creating a lampshade an easy, no-sew project that you can complete in just 1 hour!

Use your own fabric so your lampshade matches perfectly with your home decor! This kit takes all the guess-work out of making your own lampshade: everything is pre-measured so you get a perfect result the first time.

The Kit contains:
Adhesive styrene sheet
Molding stick
Lampshade glue
Top & bottom lampshade rings
Binder clips
Illustrated, step-by-step instructions


You'll also need:

Fabric 1 yard of Natural fiber fabric (light to medium weight cotton works best)

Cutting tool - scissors or a rotary cutter and mat An old paintbrush

I was sent the above product for the purpose of reviewing it on this blog. All thoughts, opinions and photographs belong to me. No monetary compensation was received.

Tuesday, January 13, 2015

Homemade Christmas Gifts


This holiday season our family has received so many awesome homemade gifts from friends and family and I wanted to share with you the hard work others have done. Maybe these ideas will help give you some ideas of your own for gifts that you want to make in the future.


This is my son with his Stegasaurus backpack and hat that my parents gave him.


This is my wooden door mat that my parents made for me.


This is my daughter with the quiver my parents made for her. Her arrows are all at home and weren't available for this picture, but she is anxious to use this with them when she goes to Archery practice.


Some yummy ice cream toppings that my parents made (well, probably just my mom.)


This is some homemade lavender-mint fabric softener that a friend made. I have already been using it so the cute tied on label is gone, plus 1/4 of the fabric softener is gone.


My MIL made me this present, which will go to the cabin with us. It is a table runner (folded in half in this picture), a button on towel, napkins, and potholders.

My parents made this wooden slide-in sofa side table for my husband. He actually has one they made him a couple years ago but we use it so often (usually the kids have confiscated it) that he really wanted to have a second one.


My MIL made this beautiful dress for my daughter and a matching one for her American Girl doll. 


My daughter made me this bracelet.


My son made these bird feeders for his grandparents.

What is missing from these pictures of homemade gifts we received are:

* Winter Survival Kit (we have already taken this apart to use, it had in it Kleenex, Airborne, Ricola cough drops, lip balm, hot cocoa, and tea) - from my parents

* Homemade Candies - caramels and peanut clusters made and given by a friend in book club

* Homemade Playdough with a cookie cutter- for my son from his preschool teacher

* Handpainted Snowman Jar filled with a tealight and candies made by my son while at preschool

* Elf/SantaCandy Jars filled with Hersey kisses and a little felt hat on top and black belt for the kids from my parents

* Hand painted picture of our cabin from one of my friends (this is still in process, I was just given a picture of the work in progress so I haven't actually received it)

Plus, I wouldn't want to forget about the gifts of time a couple of friends have given me. One friend treated me to a pedicure at a local spa and another friend took to to a dinner at a winery with thieving from the barrel. 

Gosh, I hope I didn't forget any homemade gifts. They are all wonderful and I really appreciate the time people have spent making those gifts and thinking of us. 

We also received lots of other wonderful gifts that we are extremely thankful to have received and feel very blessed to be gifted with. We are very fortunate.

Thursday, January 9, 2014

Thrifty Thursday: Fix Up Hardwoor Floor Scratches


Fixing up scratches in your hardwood floor can be quick and easy and only require a trip to your pantry. Look for a darker cooking oil; I used sesame oil. Using either a rag or paper towel rub the oil in to the wood and wipe away an excess. That's it. Although, I will warn you that if you use sesame oil you might start to get hungry for some stir fry. :)

Also, make sure you take care of what is making the scratches in the first place if it is due to rubbing. Turns out that the padded feet on the bottom of our ottoman had worn away and was scratching our floor.

This is a quick and easy solution.


Thursday, January 2, 2014

Thrifty Thursday: DIY Area Rug on a Budget


If you are lucky enough to find out when a hardware or carpet store is selling their samples, you can make yourself an area rug very inexpensively.

I made this rug a few years ago, but I was having a couple pieces that were not staying stuck down anymore, but after 3 years I think the duct tape did a good job or holding it all together.

This is the area rug in our bedroom done with browns, tans and whites, but I also made one that the same time for my daughter's room in pinks, grays and whites.

Basically, all I did was layed out the samples and figured out how I wanted them placed and then turned over each sample and started taping them down. I taped them down with duct tape and reinforced at the corners with additional tape as well as the strips of tape over each row and column. I made sure to press each down.

The rug in our room is about 5x10, which is little longer than the typical area rug but I wanted it that long because the rooms is pretty big. I made my daughter's rug about 5x5 because of the space available.

I bought my sample pieces at Lowe's when they were selling them for 50-cents a piece. My total cost for my 5x10 rug, including the duct tape was $25. 


Wednesday, April 11, 2012

GIVEAWAY and Review: PURE Inspired Design Organic Fabric

Dahlia Pillow

I am so excited to tell you about PURE Inspired Design. If you are looking for a full-service interior design service, then let me introduce you to Samantha Cobos from PURE Inspired Design. Her company was recently featured in the Reno and Decor Magazine and will be on display at the "Home Show" in Dubai in May. If you are just looking to purchase your own eco-friendly furniture, rugs, drapery and pillows you can become inspired by all the products in her shop. You can also purchase her fabric to make your own creations.

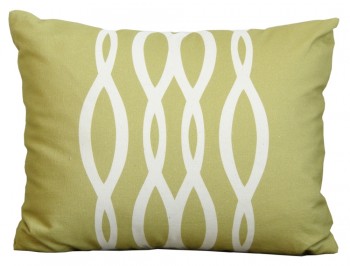
Samantha was so wonderful to send me the Dahlia Pillow (pictured above) and it had inspired me to re-design my bedroom, which is something I have been meaning to do for a while but I just never knew exactly what I wanted until I received inspiration from this pillow. Using the deep orange color from this pillow as my accent color I have decided on a new comforter  for my bed, plan to make a decorative pottery piece using orange as a over/under color and will choose a paint color that complements this color, as well as make a new headboard by re-purposing an old door I bought at a salvage store. I was really hoping to have a good start on this project already, but cooler outdoor temps have kept me from repainting the door and accent trim. So, you will have more posts to look forward to as I complete that headboard and redesign my room.

If you are looking for other inspiration in your home decorating, daily life, and to learn more about what inspires Samantha, then check out the PURE Inspired Blog.

I also wanted to mention that she is a LOCAL company (at least to me, but she might not be to other readers). She lives and works in the Twin Cities.

Marathon Pillow

ONE LUCKY READER WILL GET A CHANCE TO WIN THE MARATHON PILLOW COVER.


And if that isn't enough, you can also enter on the PURE Inspired Website for a chance to win the "Big Flower" Pillow Cover.

Big Flower Pillow

Saturday, August 22, 2009

#92 Lower Your Water Heater Thermostat

Set your water heater at 120 degrees. It the lowest you can go and still be able to kill bacteria. Anything higher is just a waste of energy and can be dangerous, especially to infants, young children and elderly who have thinner skin and are more sensitive to higher temperatures. By lowering your water heater from 140 degrees to 120 degress you can trim off about 6% on your electric or gas bill.

Tuesday, August 11, 2009

#81 Use Dehumidifier Water to Water Plants

This one is pretty easy and take less than 2 minutes. Actually, depending upon where your dehumidifier is located & where your plants are located it could be really quick. I timed myself the other day and it take me 15 seconds to empty the dehumidifier and replace the container. So, if you give yourself another minute or two you can pour it on your plants. You won't need to water your indoor plant as often as you need to empty it, but you can always pour it on your outdoor plants and landscaping (which is usually what I do with it when I have the time & energy to run up & down the stairs).