Tuesday, December 28, 2010
More Gift Ideas to Come Next Week
There are a couple more gifts that I made by re-purposing items and using up stuff I already own, but we still have one more Christmas to go and since those who will be there read this blog, I don't want to spoil the surprise. So, stay tuned!
#177 Create Paint Chip Art
 I wish I could remember where it was that the piece I saw online was that inspired me to create this art piece for my husband for a Christmas present. And since I couldn't remember where I saw it, I had to come up with my own idea of how it should look and how to make it.
 Honestly, I thought this would be a simple piece to create but it turned out to be a thorn in my side.
The supplies I used were:
* 9 pieces of paint chip samples
* 16x20 stretched canvas
* blue painter's tape
* leftover glue
* leftover wood stain
* an old rag
* leftover spray laquer
I bought the canvas from Michael's craft store & used a 20% off coupon. The paint chip samples came from Lowe's and I trimmed them square so that there was no words showing and of course these are free in the paint department.
After trimming up the paint chip samples, I glued them to the canvas. The problem was that the paper samples curled up on the sides.I tried 2 different times of gluing them down and putting objects on top to keep them flat. It did not work. Then I used blue painter's tape across all the edges to keep them down. This worked pretty well, but I did have to apply another bit of glue on the very edge and tape down a second time.
After the squares were glued flat to the canvas, I rubbed leftover wood stain over the entire canvas & squares. Then I rubbed some of the stain off the squares so more colored showed through.
Finally, after the stain was dried, I applied 2 coats of spray lacquer (letting them dry in between).
So, this was my attempt at a Christmas gift for my husband and I think it turned out pretty good. I made it for him to display in his home office. It's hard to come up with ideas to make gifts for guys, but he seemed to appreciate this one, as well as the hat I knit for him with the Knifty Knitter.
The Recycled Sweater Dress (#167)
 Here is a picture of my daughter in the dress I made for by re-purposing a cashmere sweater and wool sweater of mine. You can read more about it on my tip #167.
Monday, December 20, 2010
#176 Re-Purpose Bottles for Snow Painting
 Basically, just clean out some bottles that have a narrow spout through which you would squirt something through. Fill with water and enough food coloring to give yourself a desired color. And if you live a state that gets as much snow as we have been getting this winter (although, it's technically not winter yet), you'll want to find all the outdoor activities you can so it's not the same'ole same'ole.
 You could also do this during warmer months on a white sheet that you hang against an outdoor wall.
#175 Baby Food Jar Santa
 This was a fun craft that we did with another family that came over for a Christmas crafting playdate. It does take a glue gun, so mom's help is needed unless the kids are older.
The first thing we did was have the kids trace a circle around an old plastic lid and then cut it out. Then cut a line straight to the middle of the circle. This will allow you to shape it into a cone and glue it in this shape. Place some glue on the top of the car and place the cone on top.
Next you will want to pull apart some cotton balls and then blue them on the top & brim of the hat and also on the jar as a beard. Then I had my daughter picked out some eyes & a pom pom nose for me to glue on and finally, I used a permanent marker to draw on some rosy cheeks.
I think this turned out very cute!
#174 Rainbow Sprinkles in a Re-Purposed Jar
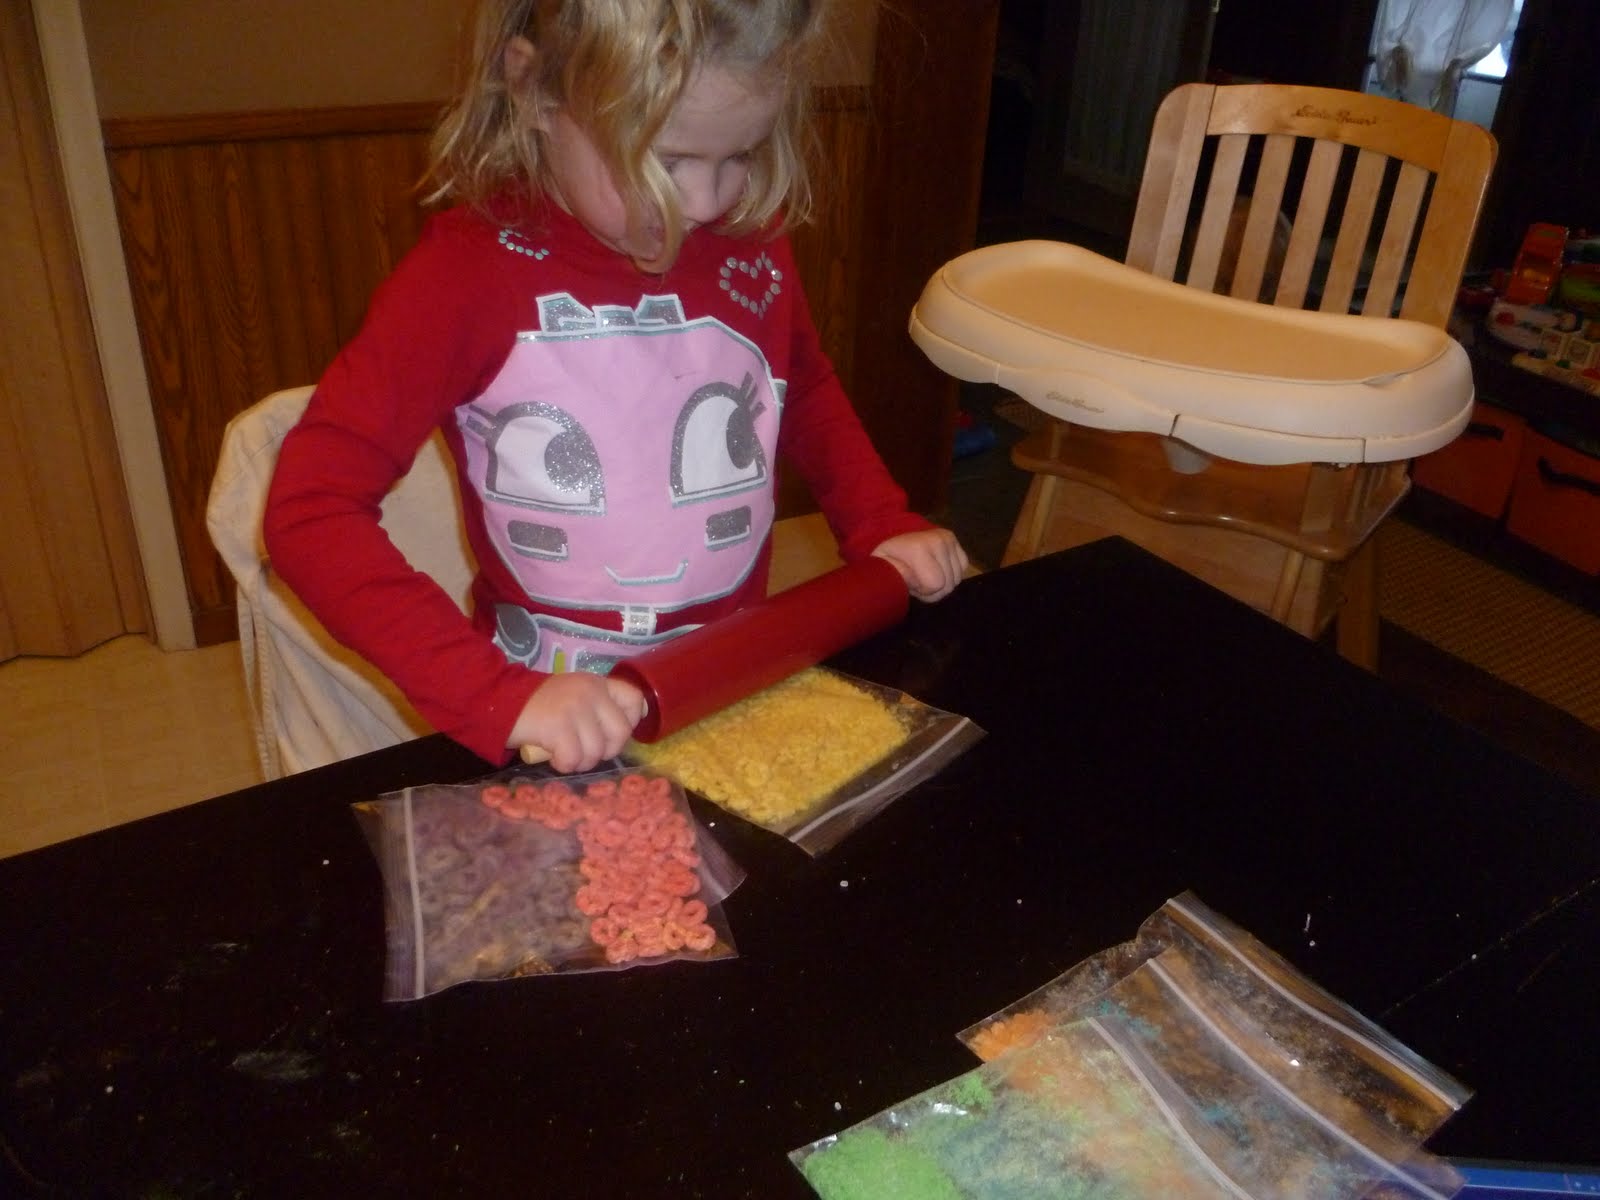 The original idea for this was not mine, I believe it came from Family Fun Magazine. What we did was sort out the 6 colors in a box of Fruit Loops into their own bowls (good sorting exercise for preschoolers). Then pour each color into their own bag. Then roll over each bag so that you crush the rings into sprinkles.
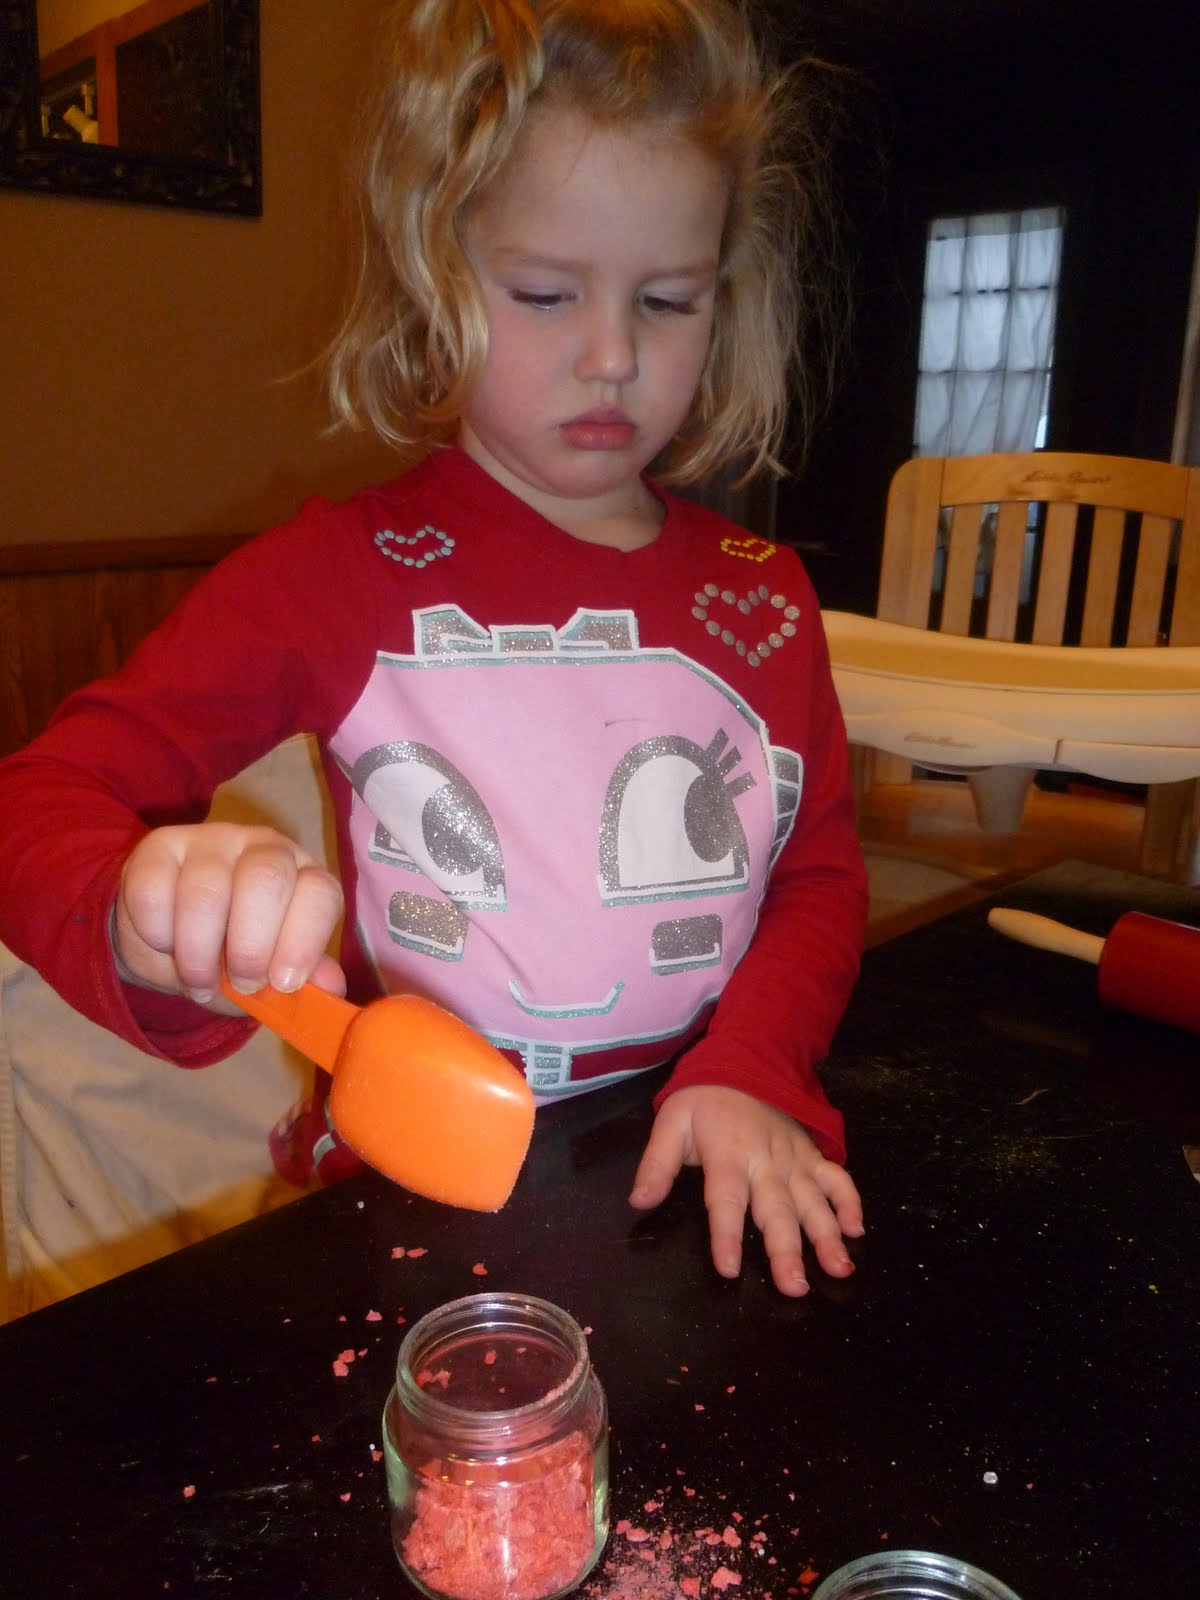 Then place a scoop of each in separate layers in each jar. We used old baby food jars (I had saved a bunch from the recycling when my son used to eat baby food, well, we still do some of the toddler chunks yet though.)
 If you want to do this activity as a teaching opportunity, you can put them in the order of ROYGBIV (well, minus one either indigo or violet.)
 And serve sprinkled on top of yogurt or ice cream. My daughter had a lot of fun making a bunch of these up to give to her friends as presents for Christmas (& one for herself, which she has been topping her yogurt with.)
#173 Make Puzzle Blocks For Your Child
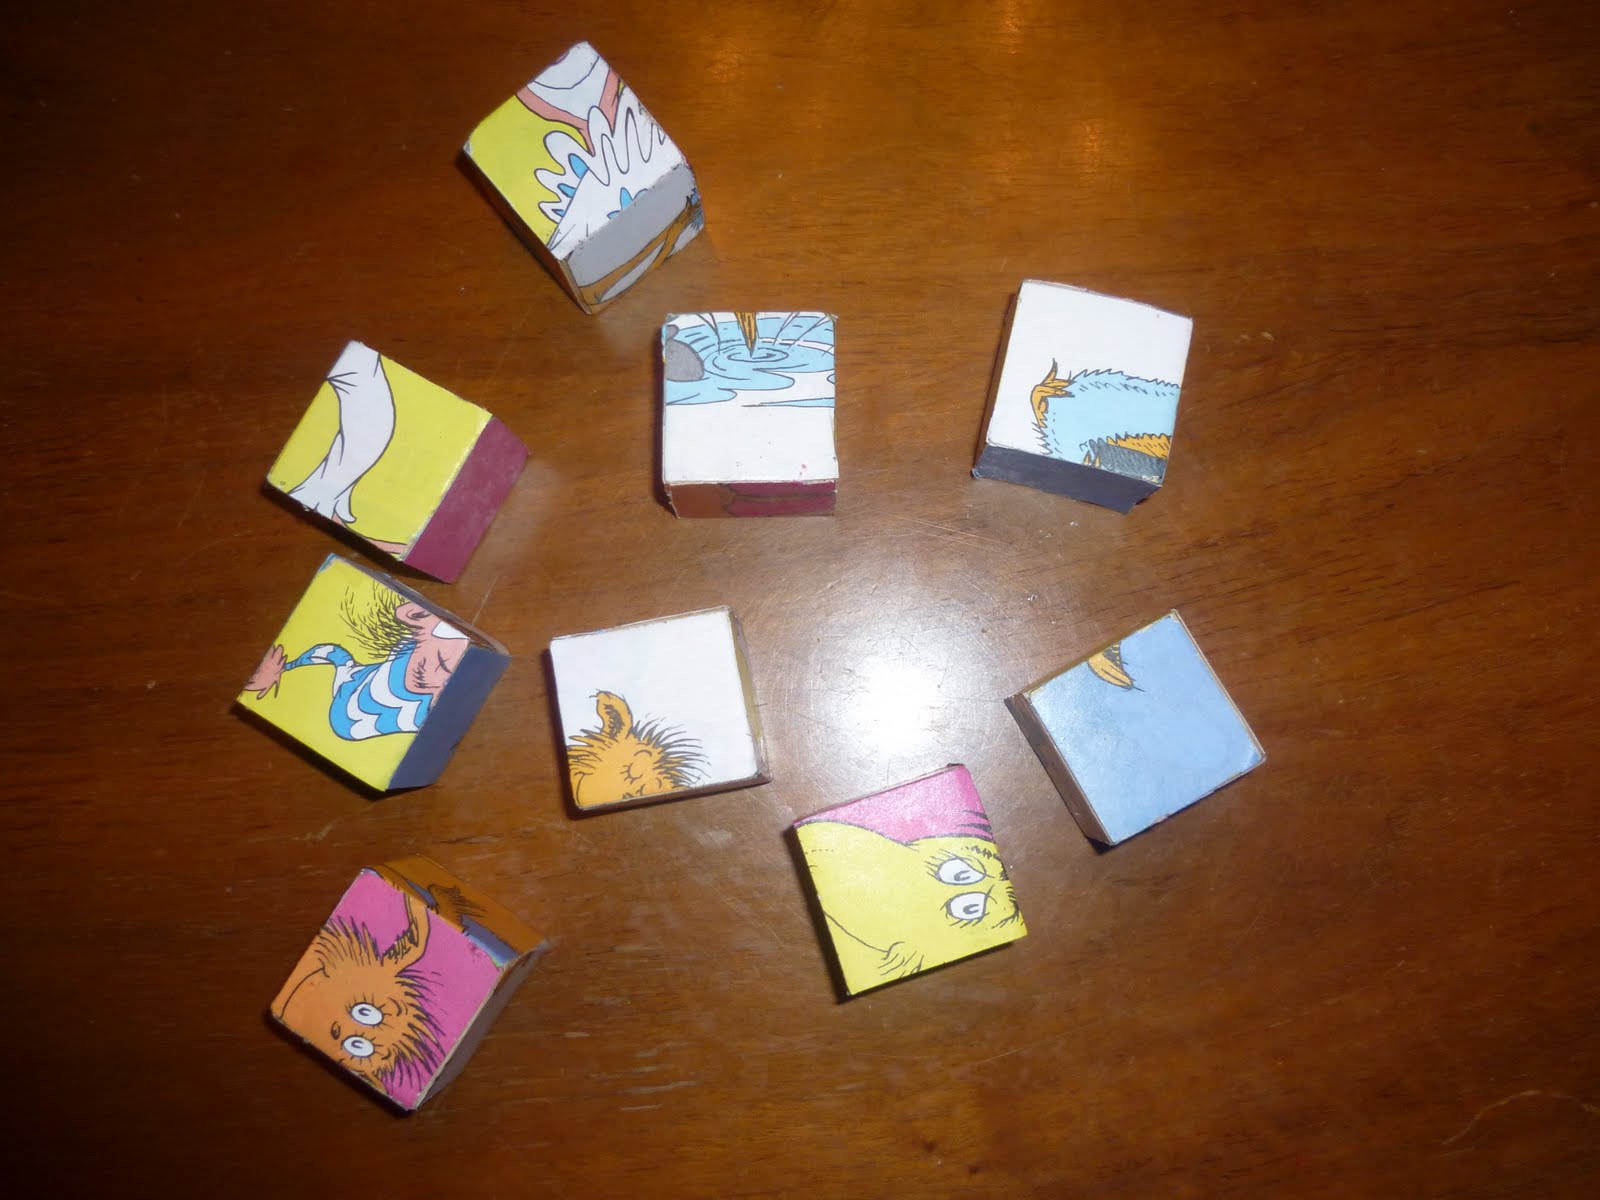 I mentioned these puzzle blocks in an earlier post. I used the same wood and cut out 9 matching squares, which we lightly sanded. Then using pictures from out of the "The Foot Book" (which a favorite in our house) which I picked up at a local thrift store, I made 6 different puzzles.
I placed all the blocks together then used spray adhesive on the top. I let it set for a couple seconds to get sticky and then pressed on the picture. Then I used an exacto-knife to trim off the edges of the picture and cut the blocks apart. And I repeated this method 5 more time to complete all 6 sides. Finally, I used some spray lacquer on all six sides to seal in the paper.
In the picture you see a representation of all the pictures used. The puzzle is a little advanced for my son at this point, but he will grow into it. Initially, he might just use it as blocks to make towers with and knock over.
#172 Make Your Own Laundry Soap
 You would have thought I would have done this before, but I had not. I actually decided to try it because I wanted to make some to give as gifts to friends for Christmas.
 Homemade Laundry Soap Recipe
2 C shredded soap bar ( I used an original Dial bar, but have seen recipes using Ivory & Fels Naptha too.)
1 C borax
1 C washing soda
Combine all items and mix. Use 1T in a front loader (or light loads in a top loader) or 2T ina top loader.

 I had doubled the recipe and made up 2 containers (above) that I was re-purposing for friends and an old Cool Whip container full. I have been using this laundry soap this week and it seems to work just fine.
 #171 Turn a Baby Food Jar into a Snow Globe
 My daughter helped me make this craft. We started with an empty, clean baby food jar and filled it with water. Then poured in some glitter and sequins to serve as "snow" and some sparkle. And finally, we found a snowman eraser and used some hot glue to adhere it to the inside of the lid. The screwed on the lid and Ta-da! We have a homemade snow globe without spending any money and re-purposing things we already owned.
Here are some other Baby Food Jar Crafts We have Made:
Christmas Decoupaged Tea Candle Holders
Rainbow Sprinkles in a Re-Purposed Jar
Baby Food Jar Santa
Valentine's Decoupaged Tea Candle Holder
Camping Nightlight
#169 & #170 MYO Fabric Gift Bags and Story Blocks
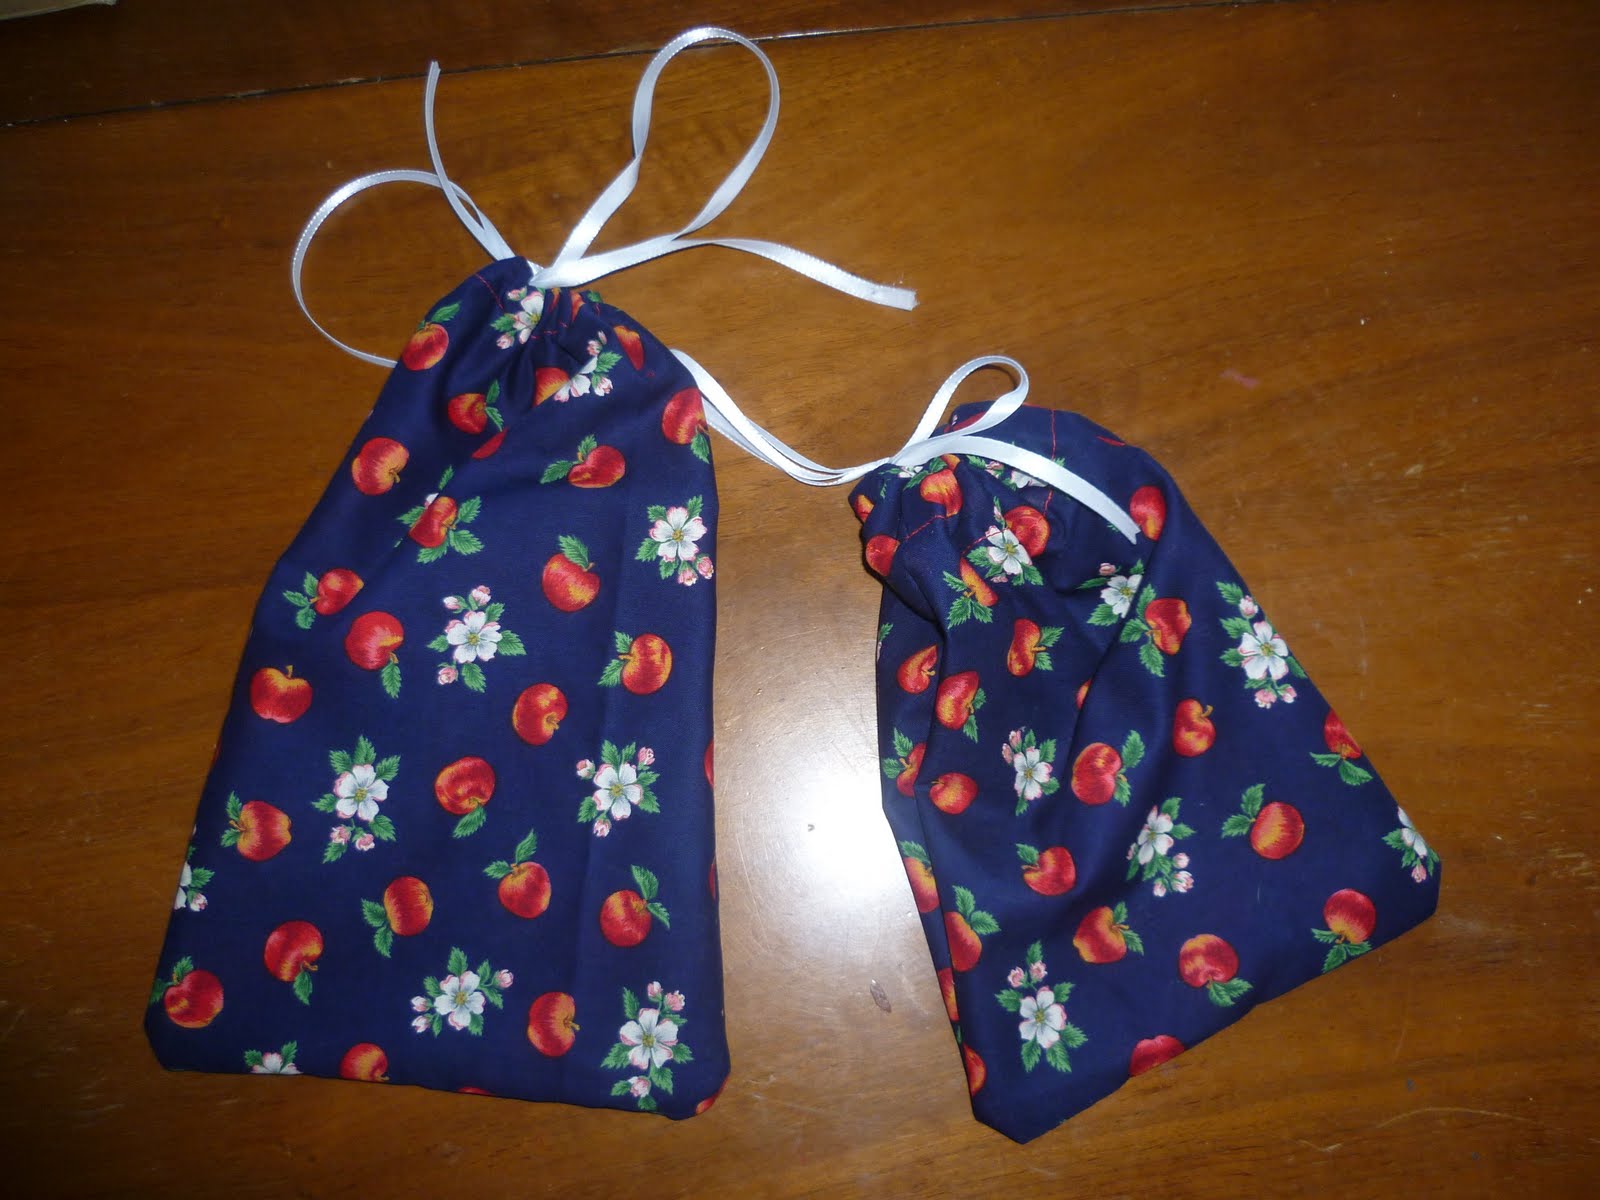 I made 3 different gift bags, two of which were stuffed with some other gifts. Gift bags are super easy to stitch up. I started by cutting out rectangular pieces of fabric. Straight stitched them with right sides together. Then folding over a hem at the top and stitching that closed, but leaving open a half inch so that I could string through ribbon. The ribbon is used to tie the bag shut. For the ribbon, I just used leftover stuff. The fabric was a new cut I had bought a while ago, but never used.
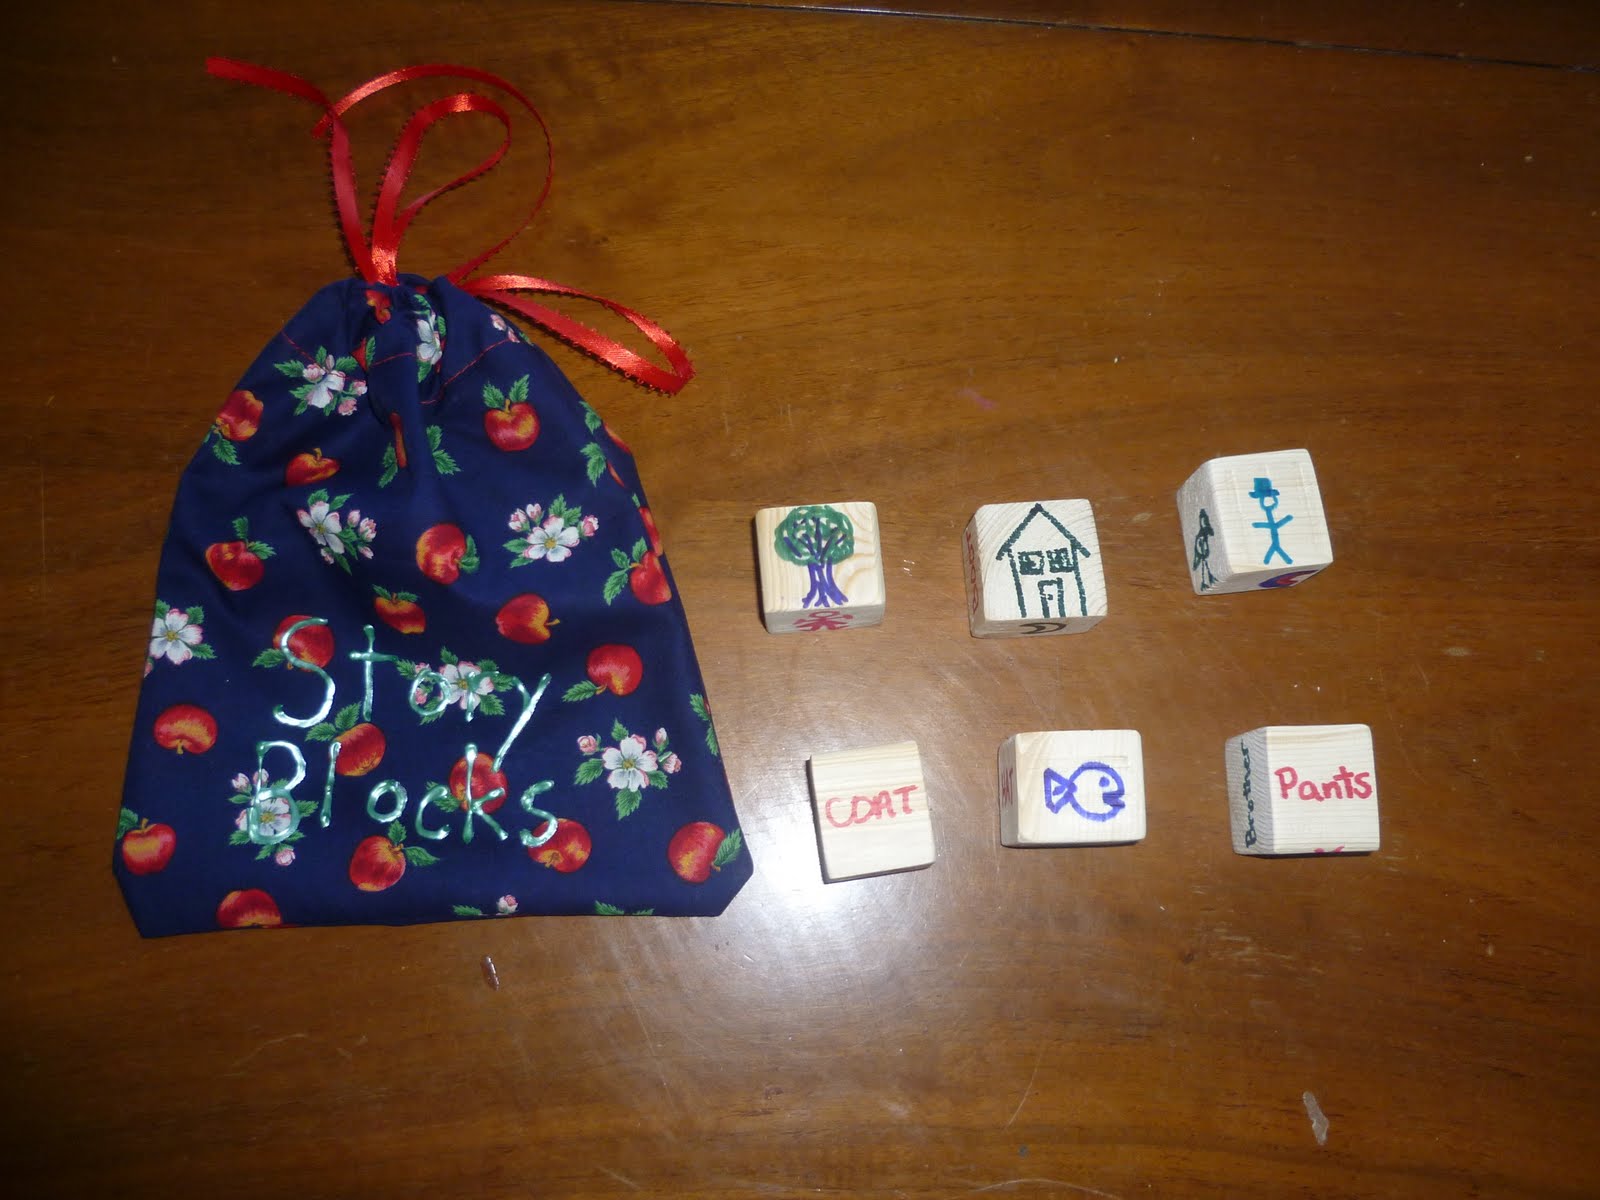 The third fabric bag I made I used fabric paint to write "Story Blocks" on it. The story blocks are a present for my daughter.
To make the story blocks, I simply bought a scrap piece of lumber at Menards (I found a scrap bin on the end of a row in the lumber department) and it was priced at 29 cents. Awesome! I was able to make this set of 6 story blocks (plus another set of 6 for a friend) and a set of 9 blocks for my son's puzzle blocks (to be posted soon).
I cut all the pieces so that they were square, sanded them, and then drew on pictures and words (thanks to my husband for helping me with sanding & drawing). The idea behind the story blocks is that she rolls them out of the bag and then has to tell me a story using all the words and pictures that are facing up.
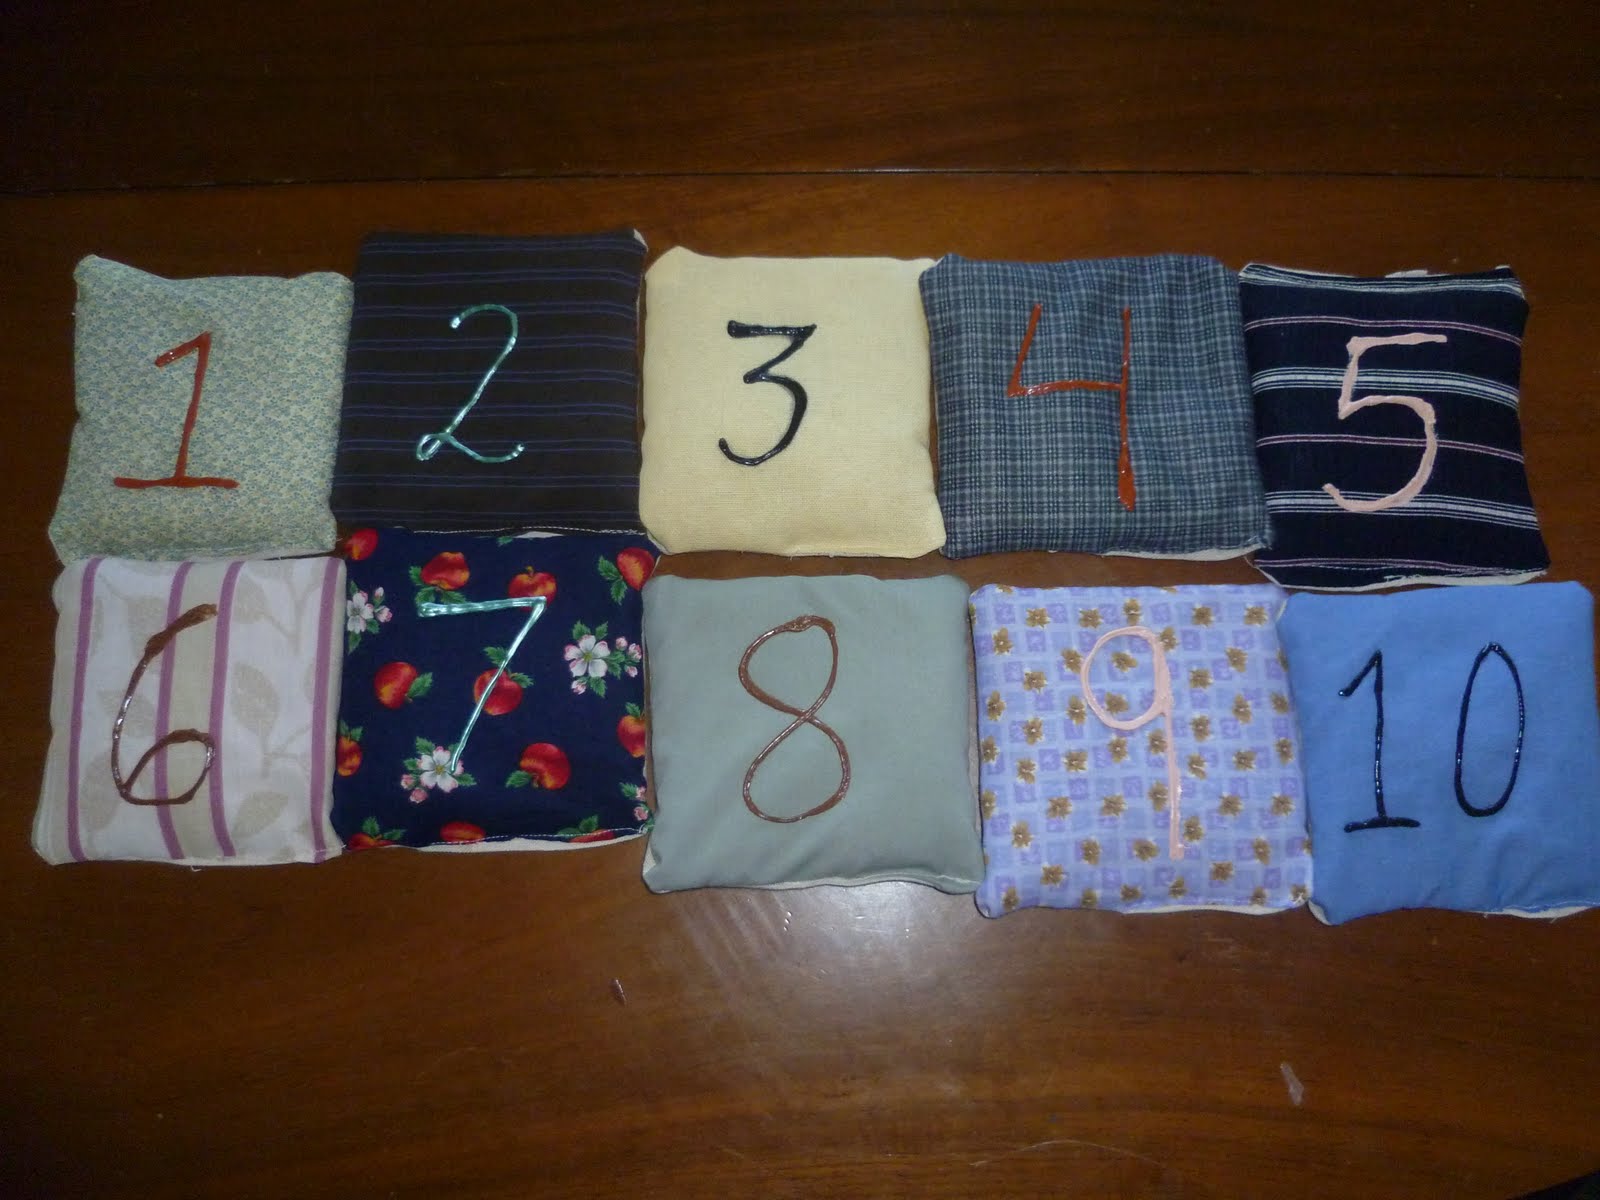
#168 Use Leftover Fabric to Make Counting Bean Bags
 This is actually one of the gifts that I made my son for Christmas. I chose to fill my little tossing bags with rice since it was cheaper at the grocery store than dried beans.
 These are easy to make, just time consuming. I first cut out 10 squares in the same fabric for the back of the bags. Then I cut out fabric from 10 different leftover scraps. Actually, a couple of these squares are made from old dress shirts of my husbands that I have been cutting up to use for projects and others were leftovers.
After cutting out all the squares, I applied numbers by using fabric paint. After these were dry I stitched the squares together with right sides in, leaving about an inch open on the end of one side so that I could turn it back right side out and insert a funnel and fill with the rice.
I wanted to have numbers on them so that I could use them as a teaching tool. I also chose many different fabrics so that I could ask my son to throw a certain color of bag, thus using it as a teaching tool in another way. Plus, there all sorts of gross & fine motor skills that can be worked on with using the bag.
Wednesday, December 8, 2010
#167 Turn Old Sweaters into a Child's Dress
 My daughter asked me if I would make her a dress for a Christmas present. And since all her presents were all ready purchased, I didn't want to spend more money to buy a pattern & new fabric so I started thinking about what I had to use and I decided to use some old sweaters that I had recently retired to the craft box.
I used a dress that is currently a perfect fit on her and just altered the measurements to make it slightly larger so it will be something she can wear all winter and now my daughter has a cashmere (blue) and wool (red) dress.
To save myself time & energy I made sure to use the bottom hem of a sweater as the bottom hem of the dress so that I wouldn't have to create a hem. I also had decided on using the red sweater because it had shrunk (quite a bit in the arms) so that I did not need to alter the arm circumference.
I did need to take in the sides and shorten the arm length and create new arm holes. The knew arm holes in the sleeves and on the body was what took the longest to do. I sure hope she likes it.
Friday, November 12, 2010
#166 Creative Uses For A Plastic Lid
 These ideas came from watching my kids play with some other ones at an ECFE (Early Childhood Family Education) class earlier this week. I knew I had a couple and thought they would be fun to make with my daughter.
 All we used was 2 lids from whipped topping containers, a hole punch, some ribbon, scissors, and a plastic bag.
The top collage is of the one I made for my son. For his I punched holes around the entire perimeter and cut out a center circle. Next I cut out strips from a plastic bag. And finally I tied them all around. He likes using his as a basketball hoop and throwing a ball through the hole. The other thing he likes to do with his is use it as an instrument (he loves to make noise). The strips of plastic hitting each other make a Sssh! Sssh! sound.
 This bottom collage is of my daughter and her version. For her version I allowed her to pick out any thin ribbon we had, while I punched holes around only half of hers after I cut out the center circle. Again, tie the ribbon through the holes. She liked using hers as a fairy crown or as dancing ribbons.
 This bottom collage is of my daughter and her version. For her version I allowed her to pick out any thin ribbon we had, while I punched holes around only half of hers after I cut out the center circle. Again, tie the ribbon through the holes. She liked using hers as a fairy crown or as dancing ribbons.
This was so simple to make and there is just so many possibilities. Make some with your kids and see what their imaginations come up with as uses. Let me know what they come up with.
The Verdict on Baby Food Muffins
 Well, you can tell by the picture of my son that they were a hit with him. I ate mine plain (without the cream cheese he has) because I had the first one and wanted to evaluate it.
 My evaluation: The proportion of wet to dry ingredients was perfect. It baked moist, but not too moist. But unless I was biting in to a spot with a carrot chunk there was no flavor. It wasn't that it was bad, there was just no flavor at all. Next time I think I will add a little minced onion and some chives and maybe a dash of rosemary too. That ought to kick up the flavor.
So, since I thought it was lacking flavor I decided to give it some by putting a smear of cream cheese on it. My son gobbled them right up, which is good because he'll be having a muffin for breakfast too.
For another recipe sneaking in veggies, check out my recipe on Black Bean Brownies.
Thursday, November 11, 2010
#165 Baby Food Muffins
 I came to the realization today that even though my son is a good eater, he doesn't like much for vegetables and you can't rationalize with a 1 year old that they need to eat their vegetables. Luckily, he eats pretty much any fruit. So, I need to branch out & try new things and sneak vegetables into things. There are a few things he will eat, like carrots or sauteed zucchini or yellow squash. When he was smaller we stopped with pureed foods pretty early because he was a good masher of table food and refused to eat any more pureed food. But now when I think back, it might of just been the vegetables he was refusing. I think he still ate the fruits fine.
So, I still have some jars of baby food left (well, pretty much just sweet potatoes and carrots and a little peas is all he ate). So, I decided to come up with a recipe to use up some of these pureed veggies & get him to eat more veggies. And the boy loves muffins & scones, so hopefully these will taste ok. They are in the oven right now, but I wanted to get the recipe typed up as I made it so that I wouldn't forget it in case they turned out pretty good. So, stay tuned for a finished picture and a review on how I thought they tasted and what my kids thought.
Baby Food Muffins
2 C white whole wheat flour
1 tsp baking powder
1/2 tsp salt
2/3 C milk
2 4oz. jars of pureed sweet potatoes
1 egg
2 T maple syrup
1 4.5 oz jar of carrot chunks, drained
Mix all ingredients (except carrots) together with blender. Fold in carrot chunks. Fill 10-12 muffin cups. Bake at 375 degrees for 18-20 min.
Tuesday, September 21, 2010
#164 Make Fairy Wands
 These were fun to make. We first collected 4 sticks (one for each in our family) of wand quality from the backyard. They we made a collection of leaves from different sources (maple tree, lilac bush & bean plants). We tied the stems of the leaves to the stick with some twine. Then we decorated the wands using markers. And finally sprinkled the wands with magic dust & sprinkles (see post #163.)
#163 Make Fairy Potions
 My daughter is REALLY into fairies these days, so we will probably have a series on crafts & activities to do with fairies. This one is making magic fairy potions. Really the magic involved in this is her imagination.
One night I told her this would be the activity we would be doing the next day and she was to create recipes that night. So, she diligently got to work. Got out her notebook & markers and began drawing pictures of things we could find in the yard to add to each of the jars.
Then we used 4 jars I had been saving (to use for whatever) and filled them with water & a drop of food coloring, mixed in up with a stick and added items according to her recipe. She ran around the backyard collecting items and putting them in the jars just as she had drawn them.
The magic part comes in with sprinkles & dust. I told her I had magic sprinkles (raw sugar) and magic dust (wheat germ). She asked what the difference was and I told her, "They do pretty much the same thing - make things magical - it's just that some fairies like to use dust and other fairies like to use sprinkles." So, she made her choice with each recipe if it needed sprinkles or dust.
Oh! And she decided what each potion did. So, now we have potions that: make big bubbles, make big carrots, make fairies life-size, and make the leaves fall from the trees.
Thursday, August 26, 2010
#162 Make Recycled Crayons
 Looks like this should be simple - right? Well, yes & no. It's not easy peeling off the paper on some of the crayons and so you end up digging in your thumb nail trying to get it. And if you have weak nails like I do, then you wreck your thumb nails and need to trim them afterwards.
 So, basically what you do is peel the paper off of and break up the crayons and put them in some type of container that can go in the oven. I first used a silicone flower container. For the second set I used a mini muffin pan (sprayed with cooking spray). Bake at 275 degrees for 10-15 minutes. You will need to watch and they are done when all crayons have melted all the way. Take out & cool. You can place the container in the freezer to make them cool faster. Then remove cooled crayons.
Now, besides wrecking havoc on my nails, I am not sure how I am really going to get those containers clean. I think the mini-muffin pan can be saved, but I think the flower silicone container will now be a permanent recycled crayon maker.
#161 Make an Alligator Puppet out of Recycled Materials
 Here is our take on the alligator puppet that Mom Tried It made. We started with 2 empty mac & cheese containers, some construction paper, glue, a black marker, tape & googly eyes. She made hers a little different, so take a look at hers as well and see if you like how she did hers better. We like googly eyes in our house, so those were a must.
 I am a firm believer in not re-creating something that is already done well that currently exists, so please visit her website to see the instructions. But seriously, this is a simple enough project that you can tell how to do it just by looking.
My son loves having his sister try to chomp off his arm. Only a 9 month old would find that hilarious.
Thursday, August 19, 2010
#160 Make Your Own Organic Teething Biscuits
 Man! These were so simple & so cheap to make compared to buying the organic teething biscuits in the store. The last box of store bought organic biscuits I bought cost me a little under $2 and I got 12 biscuits. I made 21 biscuits (so, 75% more) for the same price. And all you need is 3 ingredients: whole wheat flour, jar of baby food & maple syrup.
My son loves them! And what I love is that they are not as messy as the store bought ones and they are lasting longer than the store bought ones too. Makes this mama happy!

Organic Teething Biscuits
2 C organic white whole wheat flour
1 jar of organic baby food (applesauce, pear sauce, or apple & banana sauce)
1/2 C organic maple syrup
Directions: Preheat oven to 300 degrees. In a medium size bowl, mix all ingredients by hand until all ingredients are mixed. Then turn dough onto a floured surface and knead (adding more flour as needed) to create a pliable ball that isn't sticky. Roll out dough to 1/3 inch thick and cut out biscuits. If you don't have circle cookie cutters, you can use a rim of a cup for the larger circle and a plastic bottle cap to cut out the center circle. Or you can always cut them into bars too. Bake for 30 minutes. Let cool. They are ready to be eaten as soon as they cool, but will harden even stiffer if you leave them out for 8-12 hours. Store in air tight container and use within 2-3 weeks.
Monday, August 16, 2010
My "Green" Read List
As I am watching "Simpler Steps to a Greener Home" with Danny Seo on a DVD borrow from the library, I thought I would share what books I have recently checked out from the library that are "Green":
Green Guide for Artists by Karen Michel
Eco Books: by Terry Taylor
Green Chic: Saving the Earth in Style: by Christie Matheson
Eco Craft: by Susan Wasinger
This is actually the 3rd time I have checked out the Eco Craft book, but I wanted to look through it again because my daughter and I just completed a craft from the book (which I will share with you soon) and I wanted to refresh my memory on what other ideas she had. There are some really great ideas in this book!
I am reading Green Guide for Artists right now and I might just have to go buy this book. She is sharing some wonderful ideas and recipes for creating your own art supplies (even professional).
The books on request that I have yet to obtain are:
Rubbish: Reuse your Refuse: by Kate Shoup
Recycled Crafts Box: by Laura Martin
Sunday, August 15, 2010
#159 Dye Your Clothes Naturally
 Check in your pantry, you probably have everything you need to dye your clothes. You will need either salt, vinegar, or alum to use as a fixative. And then the berry, spice, vegetable, fruit, grass, root, flower, etc. that you will use to dye your clothes.
My daughter and I took a class on Natural Dyeing at River Bend Nature Center and we dyed my swimsuit cover (which was stained and this covered the stained nicely) using black tea and a cami & pair of socks (using red cabbage). They were also dying items with carrots, but it only dyed items a very pale yellow.
At home we used grass and tumeric to dye items. I placed everything on a white sheet so you could see the color difference better. The tumeric dyed items an orange color. What is strange though is when I put it in the wash it was orange, when I took it out it was bright yellow, and then I hung it on the line to dry and it then turned back to orange. Strange.
The grass dyed items a very pale yellow. The difference is not very noticeable and you could not see the patterns left from the rubber bands (like you can notice on the orange tumeric dyed items). So after talking to my daughter, we decided that we will use the items and try dyeing them with coffee. FYI - for both coffee & tea you do not need a fixative and they seem to absorb the color much more quickly.
What I have noticed it that items are not dyeing a solid color very nicely and it's better to use rubber bands to create patterns so that the inconsistency in color looks like it was done on purpose. Although, my tea dyed swimsuit cover did dye consistently. We'll have to see how to the coffee works.
If you would like to dye your clothes with items from your pantry, yard & gardens, then check out this website for instructions and color ideas.
I plan on using this idea for natural dyeing in combination with another craft to have a Ladies' Craft Night in the future.
#158 Cut Your Kids Hair Yourself

I honestly never thought I would cut my kids' hair, but financial necessity last year didn't offer much of a choice. This was the second time I cut my daughter's hair. This time I gave her a choice if she wanted me to cut her hair or to bring her to a salon (I had a coupon, of course). She wanted me to cut her hair. So, I decided to invest in a better size set of clips for segmenting hair which only cost me a dollar. And I have my own hair scissors & comb (which I bought in college, when I found it financially necessary to ask friends to cut my hair.)
There are plenty of videos on YouTube that illustrate how to cut your kids' hair.
I have to admit that it's a real simple cut. The tricky part is getting her to hold still and keep her head straight so I can cut is straight.
For my son, we are just trimming around his ears. Not sure I am ready cut his whole head as he moves around too much. But we'll see. Right now he likes to twirl the hair on the back of his head as a calming technique, so it would be prudent to buy some clippers at this point.
Anyways, how am I being green? Well, that is easy. I don't have to drive anywhere, so I am saving putting more carbon emissions in the atmosphere. And it's easy to see how I am saving money on the cost of a cut and tip (as well as gas money).
And it's good that I can trim up around my son's ears, because let's face it - boys & men need their haircut so much more often.
Tuesday, August 10, 2010
#157 Recycled Art Sculpture
 This is my daughter's 3D project for her Youth Art entry at the county fair (she & her brother also did some hanging art finger painting with their initials).
 We got this idea when we toured a local art center that was featuring art from area students. I can't remember what age the kids were that completed the inspiration pieces (but I think they were 3rd-5th graders). So, I studied it a bit to figure out how we could recreate one of these and here is what I came up with:
* Gather Supplies (small wooden plaque or piece of wood, a wire hanger, an old clean nylon, scissors, zip-tie, wire cutters, drill, liquid starch, paint, paint brushes, newspaper)
* Cut wire hanger on the straight part after it curves for hanging, but before where the twist is
* Drill a hole into the center of the plaque/wood (make sure to match the drill bit to the hanger size)
* Twist hanger into desired shape
* Pull nylon over hanger and trim so that it is not longer than you need
* Dip nylon in liquid starch, squeezing out excess
* Pull nylon over hanger and secure with zip-tie and let dry
* Paint wooden plaque/board/base & let dry
* Stick pointed end of hanger through paper then stick pointed end into base (the newspaper will protect the base while allowing you to paints easily)
* Paint sculpture and let dry, remove newspaper
* Display
My daughter thought her abstract sculpture looked like a dolphin and decided to call it "Princess Dolphin Sculpture".
Sunday, August 8, 2010
#156 Homemade Play-Dough
 Making play-dough is so easy. You just use ingredients from out of your pantry and you know it is safe & non-toxic. And you can make as much as you want. We made two different recipes, both are cook recipes.
Basic Play-dough
1 C water
1/2 C salt
food coloring
2 T cooking oil
1/2 tsp. cream of tartar
1 1/2 C white flour
Boil water, stir in salt. Add food coloring & mix. Add cooking oil, cream of tartar & flour and stir with spoon until mixed. Knead dough to finish mixing dough to get a consistent color.
Kool-Aid Play-dough
1 C water
1/4 C salt
1 pkg of desired flavor/color of Kool-Aid
1 1/2 T canola oil
1 1/2 C flour
Boil water, stir in salt. Add kool-aid & mix. Add cooking oil & flour and stir with spoon until mixed. Knead dough to finish mixing dough to get a consistent color. This dough will have a pleasant scent.
____________________________________________________________________
Other ideas to have fun with your play-dough is to add glitter to it or add essential oils to your basic play-dough to give it a scent.
Make sure to store in an air-tight container and it will keep quite a while.
Exciting New Projects to Come
My daughter and I have been busy working on stuff and will be sharing some new crafts & activities with you soon that include bottle vases, her own sculpture art (which she is entering in the county fair), homemade teething biscuits, and crafts made from records (& possibly the sleeves they came in.) We also made two different types of play-doh yesterday that she had fun playing with using supplies from the pantry. So, stay tuned!
Thursday, August 5, 2010
#155 Make Clothespin Fairies
 So, this craft project was inspired by the recent change to our storytime with my daughter, which now involves reading chapter books. We are currently reading a series of 7 books about the Rainbow Fairies. We just finished reading "Fern, the Green Fairy". She absolutely loves these fairies, which makes me proud.
 These are pretty simple to make. Start with some clothespins and paint them all your desired flesh color and paint on some eyes, a nose & a mouth. And then all I did was start looking around my craft room to find different materials & mediums to add clothes, hair, jewelry, & adornments to the fairies. And I used some leftover lace with sparkles in it to make the wings. And hot glue and a couple paint brushes were my best friends during this project.
It was easy to do and made a big impact on my daughter. And she has already asked me to make her some more when we start reading the series on the "Jewel Fairies". I told her I would make her one fairy using jewels and she would help me with that one, but we weren't going to make the whole set again.
Monday, August 2, 2010
#154 Create a Fairy House
 This was a fun afternoon project that I did with my daughter. She got to use her imagination and it cost us zero money. We made a fairy house/garden and tucked it underneath a lilac bush.
 I was looking up ways to make her a fairy house to go with her fairies (see picture above, instructions to come after I finish making the last three) I made her that coordinate with the chapter books we are reading, and found that a true fairy garden is made with all natural materials (no glue, rope, etc.) and it tucked away under a tree, bush, etc to keep hidden and out of sight. So, I figured we would make a "real" fairy house outside in the garden and later (if she really wants one for inside) I can make one for her to play with her fairies in the house.
All I did was choose the location and gather some bark off of some logs. She gathered the rest of the supplies and created the layout for her fairy house. On the right is the living room with couch (made of a large brown leaf that is bent) with feathers to soften it and flower seed pods as pillows and a shell (brought from inside the house) with colored glass (ok, the one non-natural thing we used) to make a foot bath.
In the center of the room are stones to create a table & four chairs. On top of the table is acorn halves for cups, a couple raspberries and some mushrooms for food. And on the right side of the house is a bed made of long grasses and a long leaf for a pillow.
The house & the roof are constructed of tree bark leaning on each other (so a slight wind could probably destroy the whole thing, but then we just build it again.) She decorated the roof with flowers, pinecones, colored glass and colored stones to make the house look pretty for the fairies. And outside the left of the house (not in the picture) she has a large stone "for decoration" and a flag made out of a stick and large sunflower leaf.
And all this cost us was two more mosquito bites for my daughter and one more for me. Darn mosquitoes.
FYI - it's easy enough to figure out how I made the fairies, but I will post information on how I made these when I make the blue, indigo & violet fairies. Yes, we have a rainbow of fairies. ROYGBIV!
Tuesday, July 27, 2010
Best Bubbles Ever!
Most of the recipes I have found & tried called for glycerin, which you can find but it can take some searching and honestly, I didn't have as good of luck with the glycerin recipe as I did with this one that uses water, dish soap & corn syrup. This recipe was used to make the bubbles used with the giant bubble maker.
So, I am going to refer you back to my idea #138 Homemade Bubbles.
#153 Making A Giant Bubble Maker
 This is simple to do with items you probably just having laying around your house. All you need are some dowels, some eye screws, a washer and cotton string. If you don't have these items at home, you can purchase them for a minimal amount at your local hardware store.
I saw this idea on Frugal Family Fun Blog and she got the idea from Childhood Magic.
The only thing I noticed was that our rope twisted at the bottom, but it still creates the giant bubbles you see above. We purchases a big fancy plastic giant bubble wand from a rummage sale this spring and it's difficult to use. Once you try a couple times to make these bubbles it will be a cinch.
Another noteworthy thing is to make sure you have GOOD bubbles. A friend gave my daughter a huge container of store-bought bubbles as a gift and we tried using that at first and it was very frustrating. Then we made our own bubbles (much more economical, plus you can whip up a batch with things you have at home - that recipe will be the next post) and we made these wonderfully huge bubbles.
#152 Carpet Squares Area Rug

This was quick and easy and makes a big impact in a room. A friend tipped me off that our local Lowe's was selling carpet samples for 25 cents a piece and I knew exactly what I wanted to do with them and we filled up our shopping car buying carpet samples to make these area rugs for three rooms. The ones featured above are in my daughter's room and in our room. I still have one to make for the basement family room area and that one will be about the same size as the one for my daughter's room.
What I first did was lay all the pieces out right side up and assemble them into a pattern I was pleased with. Then turned them over and began taping.
First I taped a small "+" where each 4 pieces met (you can't see that under the tapes over the seams). Then I alternated taping the horizontal seams with vertical seams so that they would overlap each other. Finally, I placed a short piece of tape over each end of tape to help keep it secure. I pressed the tape firmly before flipping. I was able to flip the smaller rug by myself, but the larger rug I needed help flipping since it was so long.
We already owned the duct tape and I went through about 2/3 of a roll doing these two rugs. I spent $3.75 (plus tax) on the smaller rug (4.25'x5.63') and $6 (plus tax) on the larger rug (4.25'x9).
My daughter is very pleased with her rug and very proud of it. She helped pick out all the pieces for her rug.
#151 Making Sun Prints
 This was quick, easy, fun and had a great impact on my daughter on what kind of power the sun has. There is no need to go buy special sun printing paper, just use construction paper (which happens to be on sale this week at Target for 88-cents for a pack!)
I read all sorts of instructions on doing this and lots of them said to let the items sit on the construction paper for 4-6 hours, one even said to tape the items down and put the paper in the window for a week! We got out prints in 1.5 hours and it wasn't even at high noon. It was from 2:30-4pm on a sunny day. That's it.
If you want to make more of a science experiment out of it, you could use the same color of paper and put them out at staggered times, but end them all at the same time.
We just used items around our house that could lay flat on the paper and wouldn't blow away in a slight wind.
My daughter plans to use her sun print paper as the cover to a book she wants to create, I am using mine as a card.
Monday, July 12, 2010
#150 Cook Outside with a Solar Oven
 There are many different websites out there that tell you how to make a solar oven out of a pizza box, but the one I used was this one. My daughter got a kick out of the fact that the sun cooked her pizza. From the various websites I read, it seems like this is best left to heating up items that are precooked (like hot dogs) or are melted like pizzas we made with a tortilla crust or grilled cheese.
The one picture is of her "cooked" pizza and my uncooked pizza.
Salad from our Gardens
 This was a salad we had this past weekend all from our garden: lettuce, spinach, zucchini, peas & radishes. It was very yummy!
Monday, June 14, 2010
#149 Upcycle a Shirt into a Preppy Bib
 The original idea to this was not mine; my inspiration came from lil Mop Top. I bought this shirt from a thirft store and am using an old terry handtowel as the backside. I also used the entire collar on my bib and added elastic on the backside so that as my son got older I could easily get it over his head. I am going to make him some more. They are very cute & I can make them big enough that he can continue to grow into it. It' hard to find decent large bibs for kids as they get older and now that my son is feeding himself finger food there is a lot more messes that those small bibs can't cover.
I decided to use elastic at the back because I dislike tie bibs and I dislike velcro bibs (which most tend to be) because they get stuck to everything in the wash & are easy for kids to pull off as they get older. I like bibs that you can pull over your head & snap bibs are ok too, but I don't have the tools to put snaps on (might be something I think about investing in some day.)
Monday, May 31, 2010
Vote for My Mom's Project
Want to learn how to make a strawberry planter out of a re-purposed plastic jug? Check out my mom's project on Instructables and vote for her. Thanks!
Monday, May 3, 2010
#148 Making Seed Packets
 Well, I need to give out credit for the inspiration for this project, which comes from Vale Design. The part of this project that involved recycling & using up stuff is the the seed packets. I used a small paper bag that we got at an area store recently and some leftover double-stick tape. I used a seed packet I have as a template and created my own packets, with which we filled with Wildflower seed mix that we purchased. Making the packets was easy and my daughter helped pull the backing off the tape and press down the tape and fill the packets.
 I also used the idea on there for the chalkboard pots (which I had to go out & purchase pots & chalkboard paint). My daughter also made some cards and together we made some coffee filter flowers. We will be giving her teacher and teacher's assistant these gift tomorrow for Teacher Appreciation Day.
#147 Homemade Instruments
 Well, these were super simple and quick to make. I took a leftover piece of 2x4 from the xylophone project and cut it into 2 pieces that would be small enough for my daughter to put her hands around. I then stapled the sandpaper down on all four sides and wrapped the edges in duct tape so it wouldn't peel up. She was so excited to have sandpaper blocks since she has never had these before and they have some at preschool to play.
The other instrument we made were maracas using empty spice containers. My daughter wanted each one to have a different sound, so one has a few nails in it and then the other had some rocks. My son was able to some shaking and liked them. I wrapped duct tape around the top to make it harder for little hands to get it open.
#146 Create a Backyard Xylophone
 So, here is the finished product. My daughter loves it and hopefully it will be her hours of entertainment. I need to work on some sandpaper blocks & some maracas so that she can have some other outdoor instruments and can have a backyard concert playdate with some friends.
So, here is the Instructables instructions that were the inspiration, but I have to admit that other than glancing at the picture, my husband decided to come up with his own plans.
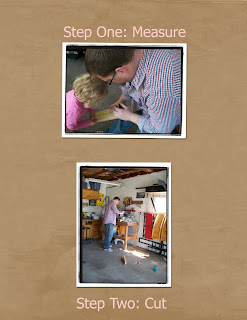 First, his plans included making it not so wide (their smallest was 22") and made the smallest cut at 12". Then he made the cuts 2 inches larger for each one and made 9 cuts in all. By starting smaller, he was able to use only two 2"x4"x8' boards.

 Then he stapled rope (he wanted to make sure it was secure so he put 3 staples on each rope segment). He used the leftover rod piece (which was about an inch in diameter) to place between the 2x4's to make sure the space was the same for each. The leftover rod piece was from making the mallet, which I will tell you about soon.
 First, his plans included making it not so wide (their smallest was 22") and made the smallest cut at 12". Then he made the cuts 2 inches larger for each one and made 9 cuts in all. By starting smaller, he was able to use only two 2"x4"x8' boards.
Next came sanding away the sharp edges left from cutting.
 Then he stapled rope (he wanted to make sure it was secure so he put 3 staples on each rope segment). He used the leftover rod piece (which was about an inch in diameter) to place between the 2x4's to make sure the space was the same for each. The leftover rod piece was from making the mallet, which I will tell you about soon.
He decided to attach one piece of string to the boards, going up one side, then across & down the other side so that the xylophone was one piece. Then he attached 2 hooks at the top of the top board and 2 at the bottom of the bottom board. He then ran rope through each one so that they could be tightened or loosened independently.
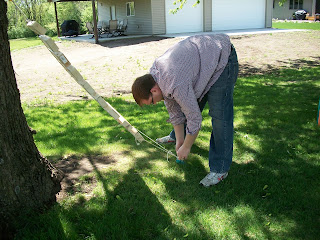
The next step is to step up the anchors use to suspend the xylophone. He screwed a heavy duty hook in the tree at the height we thought would be appropriate for our daughter. And in the ground we inserted an anchor for a dog tie-out. Then he took the rope from the top & bottom attached it to the hook & anchor and tightened the rope to create the tension desired.
 You can see a picture of the matter in the top pictures. The mallet is simply a flag pole that we cut down, then drilled a hole through towards the end and inserted some rope so that it could be hung from the hook in the tree when not in use.
 You can see a picture of the matter in the top pictures. The mallet is simply a flag pole that we cut down, then drilled a hole through towards the end and inserted some rope so that it could be hung from the hook in the tree when not in use.
Everything we used here were things we had laying around, so we didn't need to spend any money and made her this fun outdoor toy, which will help encourage even more outdoor play & music exploration. Although, the instruction says it would cost about $10 if you made it with their supplies.
Stay tuned for our homemade maracas & sandpaper blocks using stuff we will upcycle and have laying around our home.
Friday, April 23, 2010
Earth Week - Day 6
Today we finished the raised bed, made recycled plant markers & planted seeds. My husband also spread organic fertilizer on the lawn. Since we decided to do the raised garden, that took up time that I would have done other crafts. But I am much happier having made this raised garden, got a start on planting & made plant markers than if I would have done the homemade stickers and carton wallet, those are things I can do any time.
And tomorrow our plans change up to since my daughter is now spending the weekend with my in-laws and we will no longer be bringing her to Lowe's to build a bird feeder. I think I might hold off on the homemade granola bars because I really wanted to make that with/for her. So, I think I will get some more seedling started and anything else we do is weather dependent since it is supposed to be rainy.
It has been a good & productive Earth Week.
#145 Make Homemade Recycled Plant Markers
 My daughter & I had a lot of fun making these. They were simple to make and we used items we already own and recycled juice & biscuit lids.
 The supply list includes:
* Metal lids from juice & biscuit tubes
* Pictures of vegetables
* Scissors
* Glue Stick
* Clear Packing Tape
* Hot Glue Gun & Hot Glue
* Permanent Marker
* Popsicle Sticks
Directions:
Cut out pictures of vegetables that you have planted. Use glue stick & adhere to one side of the metal lid. Write name of vegetable on lid on same side as picture, on the back side I wrote the # days for germination & harvest (ex: G - 7 days, H - 45-60 days). Then take a piece of clear packing tape and tape over picture to make it water proof. Finally place hot glue on one end of a popcicle stick (we had colorful ones & I thought my daughter would think that was fun) and press together. Let cool then place in garden.
And if you want to know how I also made this more of a learning activity, I had my daughter do sorting. The lids were of three different sizes, so she had to sort into the different sizes and then I also had her sort the pictures into piles of the same picture and then I would have her identify each vegetable. She got some some scissor skill practice, as well as gluing. She also would pick a color of stick that each vegetable got and made sure she had as many of each color as she had of pictures. Fun Times!
#144 Create a Raised Garden Bed
 So, this was a project we really wanted to complete, a raised garden bed for the kids. My daughter is so pumped that she has her own garden. Really, this is going to hold a bunch of other veggies that might not have made it into the big garden because of space.
 The raised garden bed is 24 feet long by 2 feet wide by (approx) 10 inches deep. In the spirit of reusing what we already have, we used cinder blocks that were in the basement (if you know me, you know there used to be a hot tub sunk in the floor of one room in our house from previous owners & these cinder blocks helped support the tub from the basement). Well, once we removed that hot tub and made that room a playroom we were left with stacks of cinder blocks in the basement. In reality, we only used about half, so I suppose we could build another raised garden bed to match at some point.
We also already owned a roll of a permeable weed barrier from when my daughter & I put a couple of raspberry bushes in another location. But don't start thinking this project was free, we still had to fill the garden bed and we only had so much compost in our bin & grass clippings. So, we had to buy black dirt, hummus & straw to help add more layer.
For those of you who don't know, I garden by Lasagna Gardening. I started doing this several years ago and I love it. Each year my garden looks better & better and I have less & less weeds (I really should have no weeds, but I got a huge batch of BAD compost and have been fighting thistles since.)
Eventually the straw & grass will decompose more and I will have to add more layers on top, but that's it. There is no nasty weeding or tilling or digging.
Anyways, back to the construction of the raised garden bed. We did buy cedar planks to put up on the back side so that the layers did not fall through the lattice on the porches. On the tops of the cinder blocks are solid blocks (perfect for sitting & gardening, or for my daughter to walk on) and on the ends we still placed dual cored cinder blocks so that we can plant flowers in them.
My husband & I built all of this and we are starting to feel some soreness from heavy lifting. It looks good and my daughter is so proud. Today my daughter & I planted cool season (radishes, spinach, lettuce & peas) seeds in 1/3 of the garden bed. In 2 weeks we will plant our next 1/3 of seeds and then 1-2 weeks later we will plant the final seeds. And then we can start over with planting seeds int he first third.
I had taken a class on advanced organic gardening this year and the focus was on success planting, so I am excited to try this.
The large garden on the ground will have plants that have a harvest time that take the entire growing season. So, many vine-type plants & some of my tomatoes. I also have some pots by the house as well that will hold some other tomatoes & banana peppers & herbs.
Here's to an Excellent Gardening Season!
#143 Homemade Natural Floor Wax
 Ok, this one worked really well and was super easy. I made homemade hardwood floor wax for my dining room by mixing 1/4 Cup vinegar with 1/4 olive oil in a dressing mixer. Then I poured it on the floor (throughout the room) and slid across the floor with kitchen towels on my feet. After I was finished I asked my husband what he thought and he said the floor looked wet, like I had just mopped it. Woohoo! Success! The floor looks shiny & waxed. Now, I just need to do this to the rest of the rooms with hardwood floors in my house (which is pretty much the whole house.)
#142 Microwave Cleaning Naturally

Don't you just hate how stuff just sticks on all sides of your microwave? My microwave is up kind of high, so I often don't notice just how dirty it gets and often forget to look inside when I am cleaning the kitchen counters.
So, I decided to give the recipe here a try. I used both vinegar & tea tree oil. I thought I would go all the way with this and use both, rather than water & tea tree oil. I followed the instruction, but I thought more time was needed "cooking" the mixture. I needed to cook mine for 3 minutes. After the 3 minutes, everything did wipe out very easily.
Now, I don't think in the future I would use both vinegar & tea tree oil. They both have antibacterial & antiviral properties, so it's a bit of overkill. And they both can have a strong odor, and since my husband doesn't really like the smell of tea tree oil I will just cook vinegar instead.
Pictures to come soon when I get them uploaded later.
Subscribe to:
Posts (Atom)